Part 1 – The basics of writing blog posts for your salon website
This section includes the following sections -
- Logging in
- The Dashboard
- Creating a page/post
Part 2 follows – Headings, Sub-headings & keywords >>
read more on Salon Websites
Logging in
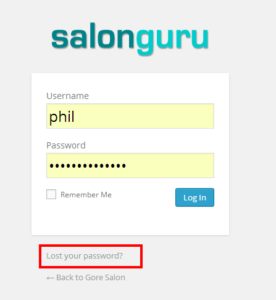
To access your website go to www.yourwebsite.com/backend - change the part in red to your website address.
 You login using your username and password - this will be sent to you via email when we 1st launch the site.
Tick the "Remember me" button so that your username and password is stored.
Notice the "Lost your password" link if you cannot remember your login.
You can change your password anytime in the backend of your website once logged in.
The Dashboard
 This is the central hub for all your sub-sections on WordPress. Here you will access all features needed for your site.
Down the left hand side you will see the main admin menu. Many of the items in this menu have sub-menus when you click on them.
You site admin menu may appear slightly different to this as each salon website has its own tools and features.
Included are :
Posts – these are for adding blog style articles/posts to your site such as ‘Pregnancy Hair Care’ or ‘Autumn Hair Colour Trends’
Media – is a library of all uploaded images to your site
Pages – these are for adding static pages for main items and services such as your Hair Colour page, Hair Cuts page, Beauty Services page etc.
Review Engine - let's you moderate and approve the client reviews that appear on your salon website and also get posted to facebook.
Comments – approve, discard, reply to customer comments that are left on the website
Staff – edit, amend, upload a new staff biog or photo here
Appearance – add pages to the main navigation menus via the ‘menu’ section under appearances
Late Deals 2 – access Late Deals section here. Update settings, add or amend current and new deals
Gallery - add and edit image galleries
Creating a Post
Posts should be used when writing a new ‘blog’ article for your site such as ‘Autumn Hair Trends’.
Adding a new Post - Hover over ‘posts’ in the main dashboard (as above) and you will see ‘add new’ appear. Click on this to create a new blank post.
Writing a post - should always follow a similar format and style for consistency. We have a set way of writing posts at Salon Guru which ensure good SEO. This article will help you understand some of the tips and techniques for writing the perfect post on your salon website.
Once you have the "new post" screen open and before we write anything, let's look at some parts of interest.
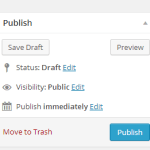
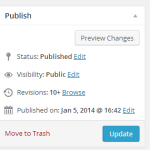
 These 2 boxes show the publish options from the far right of the screen. The 1st shows the option to Publish as this Post is not yet "live" on the website. Once it is live the box then shows Update.
You can save as Draft while writing posts. It keeps the post for later updating but it is not live on your website.
In that area you can also changed the status of a Post from Published to Draft. Useful if you have an offer or article that you don't want to appear but you want to keep for the future.
You can also edit the Date Published - useful for changing the order of posts that appear in date order.
Under the large box where we add the main content is the Excerpt Box. This is a short summary description you type in of the Posts content with keywords.
The excerpt is used as a brief snippet on summary pages likes "News" that show a list of posts with some text. On many sites we also use the excerpt for the roll-over text on Home Page boxes.
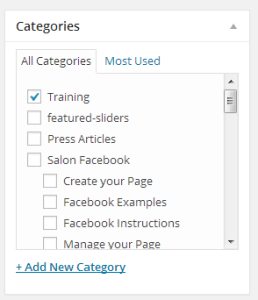
 This box shows the Categories that you need to select for your post. Salon Guru will create the categories for you and they often include News (and sub categories) and Offers.
Ticking a category will place a clickable excerpt and image on the category page e.g. the News Page. A Post can belong to more than one category (it will appear on both summary pages).
 As described above, the category pages like Salon News show the excerpt and an image that can be clicked for each post.
The image on these pages is the Featured Image that you add using this box down the right of the screen
Continue to the next section - Headings, Sub-headings & keywords >>


